These are the instructions to root Samsung Galaxy J5 SM-J500H (running on android 6.0.1, built id MMB29M.J500HXXU1BPG8) using Odin on Windows Computer.
Requirements: Your Samsung Galaxy J5 SM-J500H should have atleast 30-40 percent of battery to perform the rooting process.

Step 2: Download and extract the root files on your computer. After extracting you will be able to see the following files:
Step 3: Now, Switch off your Smartphone.
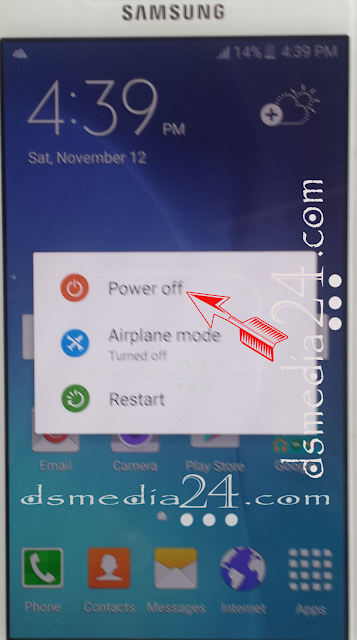
Step 4: After switching-off the phone, you need to boot into Download Mode. To boot into download mode Press and hold Volume Down, Home and Power button at same time for 5-8 seconds until download mode is active.

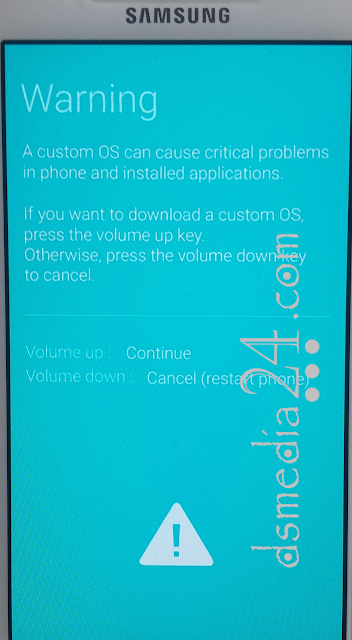
Step 5: In the Download mode you will be able to see a Warning Yellow Triangle Sign. In this situation you have to press the Volume Up key to continue.
Step 6: Now, Open Odin3 (found in the extracted files, that you have downloaded in the Step#2) on your computer. Then connect your Smartphone to the computer.

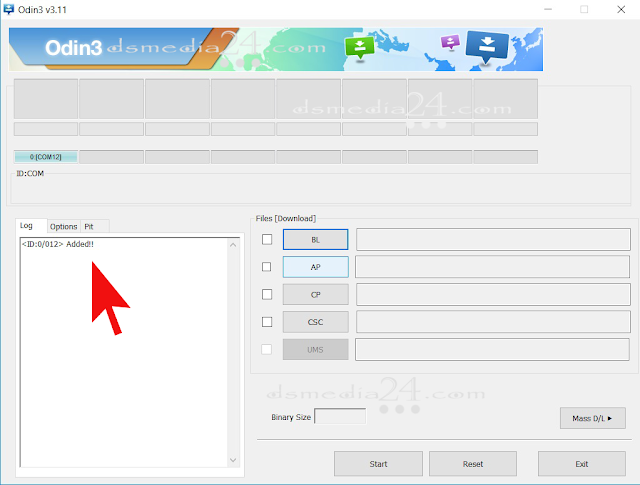
Step 7: Once you have connected the Smartphone to the computer, Odin will automatically recognize the device and show “Added” message at the lower-left panel.
Step 8: Once your device detected by Odin, click on the AP button and select the CF-Auto-Root.tar file (you have downloaded this file in step#2).
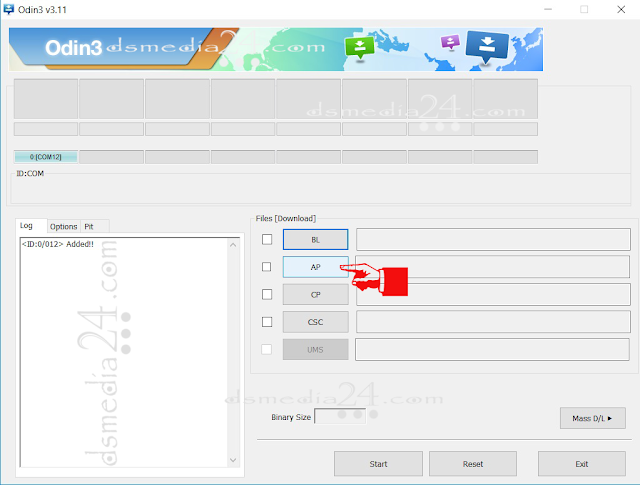
Step 9: Now, click on the Start button in Odin to begin the Flashing.
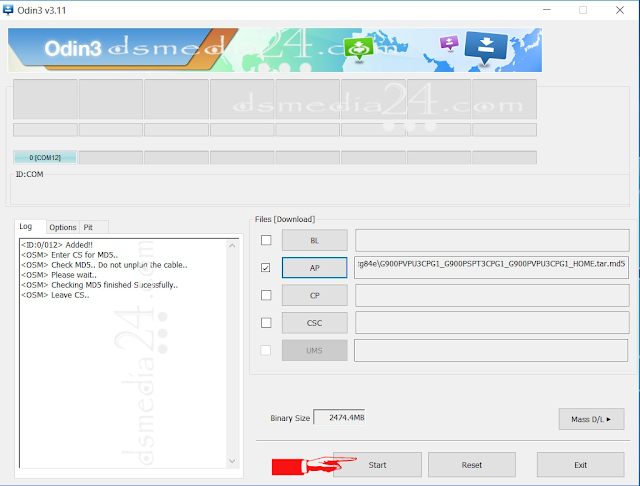
Step 10: Flashing usually takes 30-50 seconds to complete the rooting process on your Samsung Galaxy J5 SM-J500H. Once Rooting process got completed, you will be able to see a Green Box with Pass written on it in Odin. During this process Smartphone will re-boot automatically.

Step 11: Once you see, the Pass message in Odin, you can disconnect your Device from the computer.
Step 12: Now, to make sure you have successfully rooted your Samsung Galaxy J5 SM-J500H, open Applications Menu on your Smartphone and Find SuperSU App. If this app exist on your Smartphone then it means you have successfully rooted your device. Congratulations.
Optional: You can also verify the root status of your device by using the Root Checker Application.
Requirements: Your Samsung Galaxy J5 SM-J500H should have atleast 30-40 percent of battery to perform the rooting process.
Root Samsung Galaxy J5 SM-J500H using Odin
Step 1: Download and Install Samsung USB Driver on your computer. If Samsung USB Driver already installed on your computer then Skip this Step.
Step 2: Download and extract the root files on your computer. After extracting you will be able to see the following files:
Step 3: Now, Switch off your Smartphone.

Step 4: After switching-off the phone, you need to boot into Download Mode. To boot into download mode Press and hold Volume Down, Home and Power button at same time for 5-8 seconds until download mode is active.

Step 5: In the Download mode you will be able to see a Warning Yellow Triangle Sign. In this situation you have to press the Volume Up key to continue.

Step 6: Now, Open Odin3 (found in the extracted files, that you have downloaded in the Step#2) on your computer. Then connect your Smartphone to the computer.

Step 7: Once you have connected the Smartphone to the computer, Odin will automatically recognize the device and show “Added” message at the lower-left panel.


Step 9: Now, click on the Start button in Odin to begin the Flashing.


Step 11: Once you see, the Pass message in Odin, you can disconnect your Device from the computer.
Step 12: Now, to make sure you have successfully rooted your Samsung Galaxy J5 SM-J500H, open Applications Menu on your Smartphone and Find SuperSU App. If this app exist on your Smartphone then it means you have successfully rooted your device. Congratulations.
Optional: You can also verify the root status of your device by using the Root Checker Application.


faltu
ReplyDelete